Vertical centering
WHY
Because your client still uses IE 10 and you can’t use Flexbox. Webflow doesn't support IE 10 and IE 10 doesn’t support Flexbox.
WHAT
Align an object vertically inside a parent div.
Rules & Regulations
- Does not work with min-height
- Height must be set with px, %, vh (and can't be auto)
Instructions
Give the element a relative position with a top: 50%
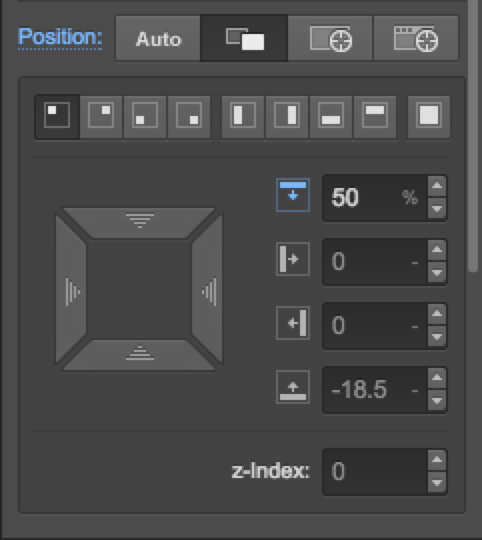
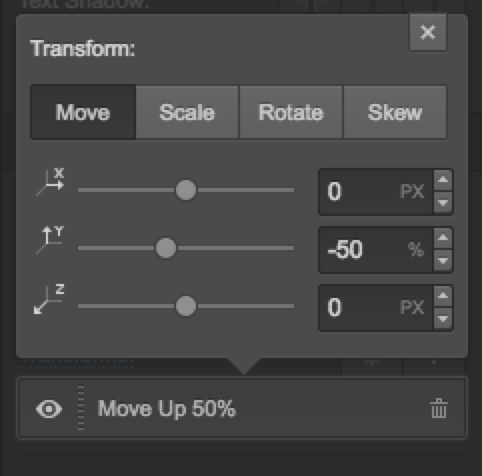
Go down to the transform styles, and give it a -50% y
Equal-height objects
WHY
Flexbox still sucks in IE 10.
WHAT
To keep your elements vertically aligned, based on the tallest height.
Instructions
In the Custom Code section of your site, copy and paste the snippet below in the Footer Code.
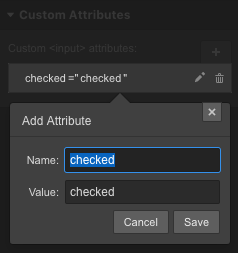
In the Designer Mode, go to the Custom Attributes (under settings) of the element and add an attribute with name data-mh.
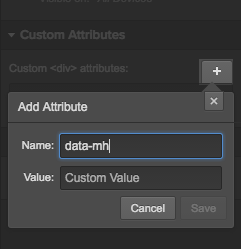
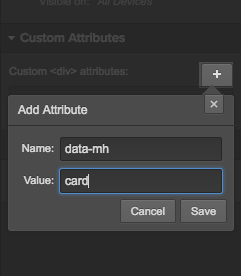
Add a value to your attribute. Here, we use card as the value but this value can be anything as long as it’s the same value on all elements on the page that need to be equal height.
Style the select dropdown
Why
Webflow has a default style for select dropdowns.
WHAT
This overrides Webflow's default style and allows you to customize select dropdowns.
Instructions
In the Custom Code section of your site, copy and paste the snippet below in the Header Code.
In this instance, banana is the class name that should be added to your select dropdown.
In the Designer, edit your banana class to look however you like. Make sure to add a new arrow icon as a background image.
Smooth Form field
WHY
For instances where you don't want the input field to have rounded corners on mobile. Webflow for whatever reason adds a boo boo little curve to them so this smoothes it out.


Instructions
In the Custom Code section of your site, copy and paste the snippet below in the Header Code.
Custom Bullet List Icon
Why
Webflow has a default style for bullet lists
WHAT
This overrides Webflow's default style and allows you to add any img, png, svg as a bullet list by simply adding "special-list" or "special-list" + "alt" combo class to your list component.
Instructions
In the Custom Code section of your site, copy and paste the snippet below in the Header Code.
In this instance, special-list is the class name that should be added to your list component.
Note: Add special-list to you whole list component, not to individual list items. The code uses a dynamic selector; basically says automatically find and replace the bullet of any list item inside of a div with class "special list". This means we don't have to add it to each and every list item manually :) Computers, amirite?
In the Designer, edit your list item class to allow space for your new icon. Eg, add some left padding if your custom icon is wider than the default bullet
PRE-SELECTED RADIO BUTTON
Why
Webflow has a "start checked" setting for checkboxes, but not for radio buttons :(
WHAT
This adds the same functionality to a radio button. Dad says: Remember, you can only set one radio button to be checked at a time in a button group.
Instructions
Add the following to the data-attribute on the input (radio button) itself (not the label)
Profit
Link to tab on another page
WHY
This allows you to open up a specific tab when you link to it.
Instructions
In the Custom Code section of your site, copy and paste the snippet below in the Footer Code.
(function () {
$(document).ready(function(){
var tabName = getParam('tab');
if (!tabName) return;
$('.' + tabName).triggerHandler('click');
function getParam(name) {
 name = name.replace(/[\[]/, "\\[").replace(/[\]]/, "\\]");
var regex = new RegExp("[\\?&]" + name + "=([^&#]*)"),
results = regex.exec(location.search);
return results == null ? "" : decodeURIComponent(results[1].replace(/\+/g, " "));
 }
});
}());
</script>
Add a class to the tab you want to link to. I'll be adding class target-tab-link in this example.
Link the button/link (that is linking to the tab on another page) to URL:
/page?tab=target-tab-link
(page will be the name of your page).
Text break
What
To force your text to break to the next line when it's a string of letters.
Instructions
In the Custom Code section of your site, copy and paste the snippet below in the Header Code.
word-wrap: break-word;
}
Add class text-force-wrap to your text.
Use img tag instead of background images
Why
For clients who ask for a CMS outside of Webflow, Drupal 8 does not support background images.
WHAT
Allows images to cover like background images.
Instructions
Drop an image inside of a div.
Add a class to the div and give it relative positioning.
In the Custom Code section of your site, copy and paste the snippet below in the Header Code.
The height can be set to your preference.
object-fit :cover;
width :100%;
height: 700px;
}
Font smoothing
Why
Sometimes fonts render ugly.
WHAT
This helps them look better and truer to your mockups.
Instructions
In the Custom Code section of your site, copy and paste the snippet below in the Header Code.
-webkit-font-smoothing: antialiased;
}
Hide elements for printing
Why
For pages that need to be printer-friendly.
WHAT
This hides elements on your page so that your users won't print out unnecessary items and waste ink.
Instructions
In the Custom Code section of your site OR the Custom Code section of your page (this should be determined on a case by case basis), copy and paste the snippet below.
@media print
{
/* hide elements */
.class-name, .another-class-name, .etc {
display: none !important; }
}
Create table with code embed
Why
You need to build a wonderful RESPONSIVE table and things can get messy if you build div by div.
WHAT
This is custom code you'll be embedding into your site.
Instructions
Drag the embed component into your site from the Elements panel.
Copy and paste the table HTML below.
<thead>
<tr>
<th>Monday</th>
<th>Tuesday</th>
<th>Wednesday</th>
<th>Thursday</th>
<th>Friday</th>
</tr>
</thead>
<tbody>
<tr>
<td>Pilates</td>
<td>Jazzercise</td>
<td>Yoga</td>
<td>Cycling</td>
<td>Swimming</td>
</tr>
</tbody>
</table>
Create your table class styles targeting the th (table header) and td (table data).
font-weight: 400;
padding: 20px;
background-color: #e2e2e2;
border-style: none;
border-width: 0px;
overflow:wrap;
word-break: normal;
color: #333;
}
.table-block td {
padding: 20px;
overflow: hidden;
vertical-align: text-top;
border-top: 1px solid #d5d5d5;
}